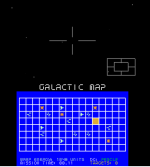
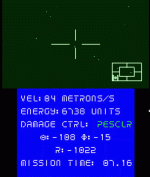
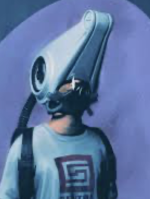
In the early 80s, the first home computers appeared in German department stores (link to audio podcast in german language). Before I got my own VIC20, these booths were the only way to get in touch with home computers and the sales staff were happy to have young people standing in front of the machines demonstrating the unknown systems to other interested people. So it happened that I spent hours of my free time in a department store in front of an Atari 400 playing Star Raiders.
Later at home I tried to reprogram Star Raiders on my VIC20 in BASIC and of course this could never be successful. When I got an Amiga, I thought about splitting the RGB signal and reproducing the game as an anaglyph display on two tube-based b/w camcorder viewfinders as a head mounted display to get a real 3D effect. But this project was never finished either.
When I bought a backup 3DS for my daughter early this year because I needed to fix various things on hers and didn't know if I would succeed, I got a device with the wrong region code and none of our game cardridges worked. Luckily, though, I managed to fix the old one for my daughter.
To make the otherwise worthless wrong-region 3DS usable for me, I installed the homebrew channel and i wondered how to create such homebrew software. I quickly found the toolchain devkitPro. The enclosed examples are certainly good, but of course they only show their small range of functions and therefore do not give a good overview. Unfortunately, large homebrew projects quickly become very confusing and one gets lost in the extensive code. The program 3DS_mandelbrot seemed like a good start for me, because it is an extremely small code, shows graphics on both screens, uses the 3D effect of the 3DS and uses the touch display as well as the buttons. When I asked myself what my first 3DS homebrew app could be, the idea of making a 3D Star Raiders replica came back to me.
The Mandelbrot homebrew basically uses everything I wanted to use for the game, so I was able to simply take over large parts of the main function, especially the initialisation and the ending:
The main loop also already contains everything you need for a complete 3DS homebrew:
So instead of drawing the Mandelbrot set, I "only" had to draw the view into space and the cockpit. However, I just couldn't get the pixels where I wanted them to be. Although I had the function for drawing the Mandelbrot set in front of me, it took me hours to understand that the screens were rotated 90 degrees from what I expected.
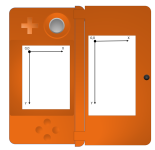
So x and y coordinates have to be swapped and you are dealing with a display that is 240 pixels wide and 400 pixels high. This would not be so bad if each pixel did not consist of 3 colour bytes. So if you don't take the rotated display into account and write the colour bytes in y instead of x direction, you get a mighty mess on the screen. However, I have implemented this swap in the basic drawing functions so that I could continue to work with a familiar coordinate system in the programme without getting a knot in my brain. You also get unpredictable effects when writing to a frame buffer while the display is configured as a console. So getting debug output isn't an easy task when both screens are in use for graphics. Another surprise came when I thought the 3D slider would control the 3D effect on the hardware side. In fact, the slider is just another (analogue) input. You have to calculate the stereo separation in the programme depending on the slider position and take the offset into account when drawing in the frame buffers.
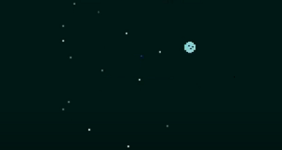
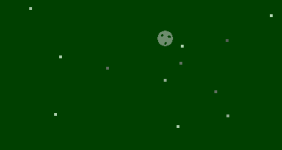
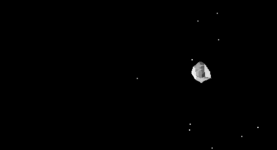
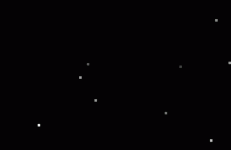
With this knowledge I was able to realise a wonderful 3D flight through a starfield as a first step.
Since I couldn't configure a console debugging was difficult and I needed writing on the display anyway, so I created a function that can write text to coordinates in the framebuffer:
It can be used to write to both displays because a pointer to a frame buffer is specified. If you want to write text in a certain 3D depth, you have to call the function for the left and the right frame buffer and adjust the position.
The parameter max_width seems unnecessary at first glance, because the width is basically fixed. However, in order not to have to have one function for the upper and one for the lower screen, I have included this parameter. I created the font myself and build it as a c data structure:
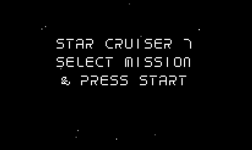
This representation had the advantage for me that I could draw the letters and symbols directly in the text editor into the bit fields (when I had finished drawing the upper-case letters, I remembered that Star Raiders also only used upper-case letters and saved myself the mindless creation of lower-case letters).
Later at home I tried to reprogram Star Raiders on my VIC20 in BASIC and of course this could never be successful. When I got an Amiga, I thought about splitting the RGB signal and reproducing the game as an anaglyph display on two tube-based b/w camcorder viewfinders as a head mounted display to get a real 3D effect. But this project was never finished either.
When I bought a backup 3DS for my daughter early this year because I needed to fix various things on hers and didn't know if I would succeed, I got a device with the wrong region code and none of our game cardridges worked. Luckily, though, I managed to fix the old one for my daughter.
To make the otherwise worthless wrong-region 3DS usable for me, I installed the homebrew channel and i wondered how to create such homebrew software. I quickly found the toolchain devkitPro. The enclosed examples are certainly good, but of course they only show their small range of functions and therefore do not give a good overview. Unfortunately, large homebrew projects quickly become very confusing and one gets lost in the extensive code. The program 3DS_mandelbrot seemed like a good start for me, because it is an extremely small code, shows graphics on both screens, uses the 3D effect of the 3DS and uses the touch display as well as the buttons. When I asked myself what my first 3DS homebrew app could be, the idea of making a 3D Star Raiders replica came back to me.
The Mandelbrot homebrew basically uses everything I wanted to use for the game, so I was able to simply take over large parts of the main function, especially the initialisation and the ending:
C:
int main() //using xem's template
{
  // Initializations
  srvInit();        // services
  aptInit();        // applets
  hidInit();        // input
  gfxInitDefault(); // graphics
  gfxSet3D(true);   // stereoscopy (true: enabled / false: disabled)

  circlePosition c3po;
  touchHandler t;

  ... // Mainloop here

  // Exit
  gfxExit();
  hidExit();
  aptExit();
  srvExit();

  // Return to hbmenu
  return 0;
}
The main loop also already contains everything you need for a complete 3DS homebrew:
C:
// Main loop
  while (aptMainLoop())
  {
    // Wait for next frame
    gspWaitForVBlank();

    // Read which buttons are currently pressed or not

    hidScanInput();
    hidCircleRead(&c3po);

    ... // Progam logic and screen drawings here

    // Flush and swap framebuffers
    gfxFlushBuffers();
    gfxSwapBuffers();
  }
So instead of drawing the Mandelbrot set, I "only" had to draw the view into space and the cockpit. However, I just couldn't get the pixels where I wanted them to be. Although I had the function for drawing the Mandelbrot set in front of me, it took me hours to understand that the screens were rotated 90 degrees from what I expected.

So x and y coordinates have to be swapped and you are dealing with a display that is 240 pixels wide and 400 pixels high. This would not be so bad if each pixel did not consist of 3 colour bytes. So if you don't take the rotated display into account and write the colour bytes in y instead of x direction, you get a mighty mess on the screen. However, I have implemented this swap in the basic drawing functions so that I could continue to work with a familiar coordinate system in the programme without getting a knot in my brain. You also get unpredictable effects when writing to a frame buffer while the display is configured as a console. So getting debug output isn't an easy task when both screens are in use for graphics. Another surprise came when I thought the 3D slider would control the 3D effect on the hardware side. In fact, the slider is just another (analogue) input. You have to calculate the stereo separation in the programme depending on the slider position and take the offset into account when drawing in the frame buffers.
With this knowledge I was able to realise a wonderful 3D flight through a starfield as a first step.

Since I couldn't configure a console debugging was difficult and I needed writing on the display anyway, so I created a function that can write text to coordinates in the framebuffer:
C:
void draw_text (char* text, u8* fbAdr, int posX, int posY, int color, int max_width)
{
    int i;
    int x, y;

    x = posX;
    y = posY;

    for (i=0; i < strlen(text); i++)
    {
        if ((x+8 < max_width)&&(y+8 < HEIGHT))
        {
            int idx = (int)text[i] - 32;
            int j, k;
            for (j=0; j<8; j++)
                for (k=0; k<8; k++)
                {
                    u8 pixel = character[idx][7-j][k];
                    if (pixel == 1)
                    {
                        fbAdr[3*((x+k)*HEIGHT + y +j)+0] = color_b[color];
                        fbAdr[3*((x+k)*HEIGHT + y +j)+1] = color_g[color];
                        fbAdr[3*((x+k)*HEIGHT + y +j)+2] = color_r[color];
                    }
                }
        }
        x+=8;
    }
}
It can be used to write to both displays because a pointer to a frame buffer is specified. If you want to write text in a certain 3D depth, you have to call the function for the left and the right frame buffer and adjust the position.
The parameter max_width seems unnecessary at first glance, because the width is basically fixed. However, in order not to have to have one function for the upper and one for the lower screen, I have included this parameter. I created the font myself and build it as a c data structure:
C:
u8 character [128][8][8] =
    {
        {    // space 32
            {0,0,0,0,0,0,0,0},
            {0,0,0,0,0,0,0,0},
            {0,0,0,0,0,0,0,0},
            {0,0,0,0,0,0,0,0},
            {0,0,0,0,0,0,0,0},
            {0,0,0,0,0,0,0,0},
            {0,0,0,0,0,0,0,0},
            {0,0,0,0,0,0,0,0}
        },
        {    // exclamation mark 33
            {0,0,0,1,1,0,0,0},
            {0,0,0,1,1,0,0,0},
            {0,0,0,1,1,0,0,0},
            {0,0,0,1,1,0,0,0},
            {0,0,0,1,1,0,0,0},
            {0,0,0,0,0,0,0,0},
            {0,0,0,1,1,0,0,0},
            {0,0,0,1,1,0,0,0}
        },
        {    //double quote 34
            {0,0,1,0,0,1,0,0},
            {0,0,1,0,0,1,0,0},
            {0,0,0,0,0,0,0,0},
            {0,0,0,0,0,0,0,0},
            {0,0,0,0,0,0,0,0},
            {0,0,0,0,0,0,0,0},
            {0,0,0,0,0,0,0,0},
            {0,0,0,0,0,0,0,0}
        },
        {    // hash 35
            {0,0,0,1,0,0,1,0},
            {0,0,0,1,0,0,1,0},
            {0,1,1,1,1,1,1,1},
            {0,0,0,0,0,1,0,0},
            {0,0,0,0,0,1,0,0},
            {1,1,1,1,1,1,1,0},
            {0,1,0,0,1,0,0,0},
            {0,1,0,0,1,0,0,0}
        },
                ...
This representation had the advantage for me that I could draw the letters and symbols directly in the text editor into the bit fields (when I had finished drawing the upper-case letters, I remembered that Star Raiders also only used upper-case letters and saved myself the mindless creation of lower-case letters).

Last edited:

